Note: Archiving allows you to keep important messages while freeing up space for new messages. Archived messages cannot be accessed from Outlook Web. Auto Archiving in not recommended for shared mailboxes. Click here for manual archiving instructions.
1. Open Outlook
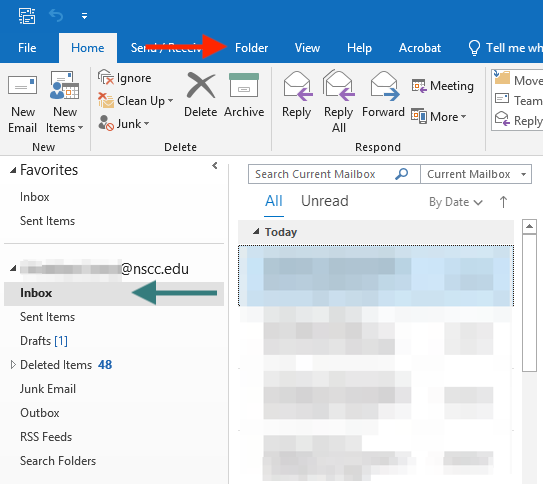
2. Click on the inbox of the account that you wish to setup archiving for
3. Click on the Folder tab
4. Click AutoArchive Settings
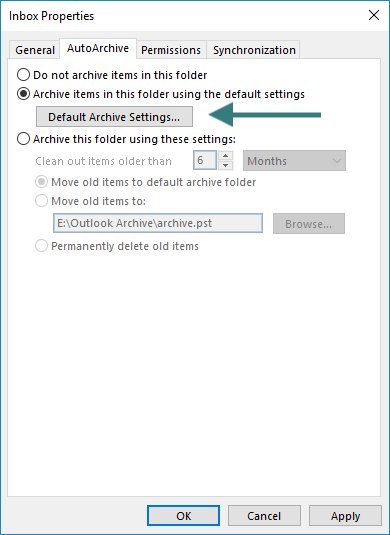
5. Select “Archive items in this folder using the default settings”
6. Click on “Default Archive Settings…”
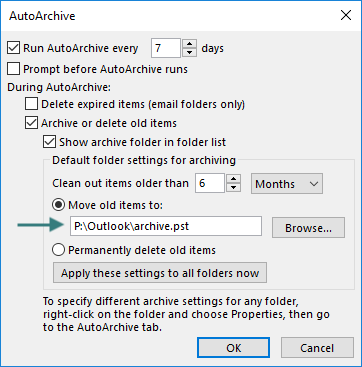
7.
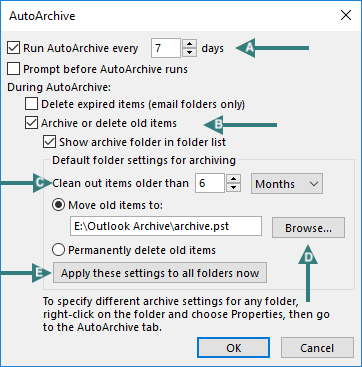
a) Check “Run AutoArchive every” and then choose how many days the AutoArchive should wait before running again
b) Check “Archive or delete old items” and “Show archive folder in folder list”
c) Select how old items should be before moving them to the archive
d) Select “Move old items to:”, click “Browse” to change where the archive is saved.
We recommend storing your archive on our file servers in your Personal/Home/P drive folder. Use the steps under Personal Drive Storage to store your archive on the file server before continuing.
e) Click “Apply these settings to all folders now”
8. Click “OK”
9. Click “OK” again
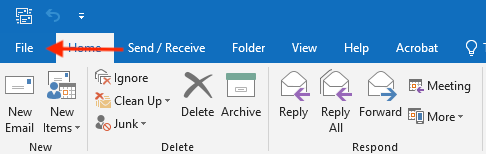
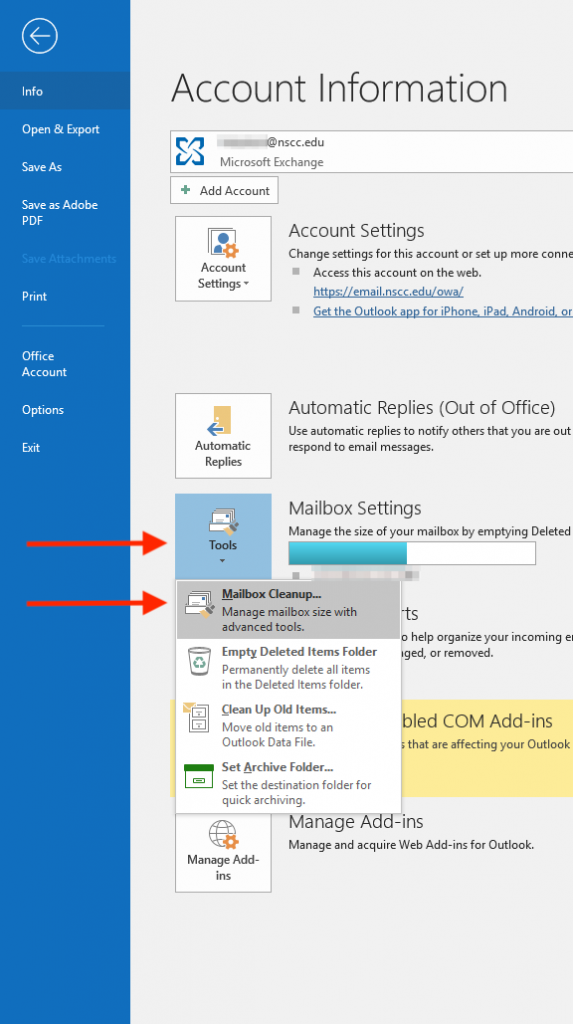
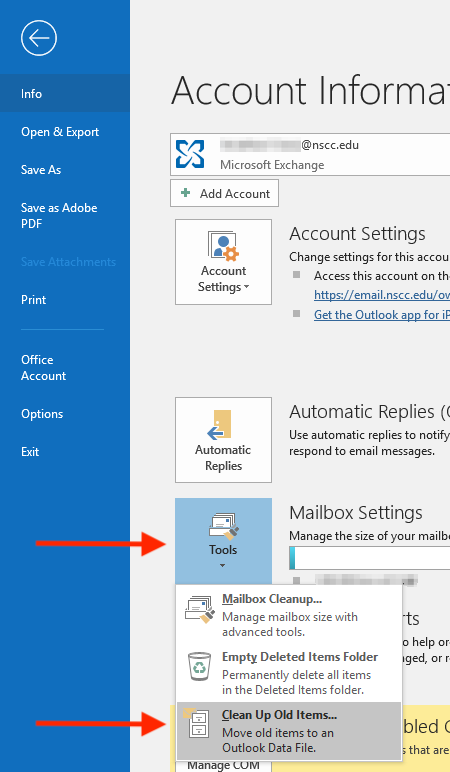
10. Click “File”
11. Click “Tools”
12. Click “Mailbox Cleanup…”
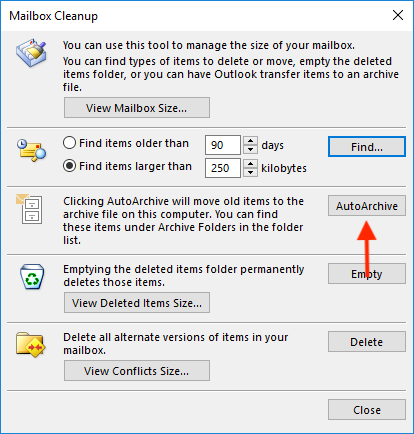
13. Click “AutoArchive” to immediately run your Auto Archive settings
14. Click “Close”
Outlook will begin archiving items in the background. You can use your computer as normal.
Personal Drive Storage
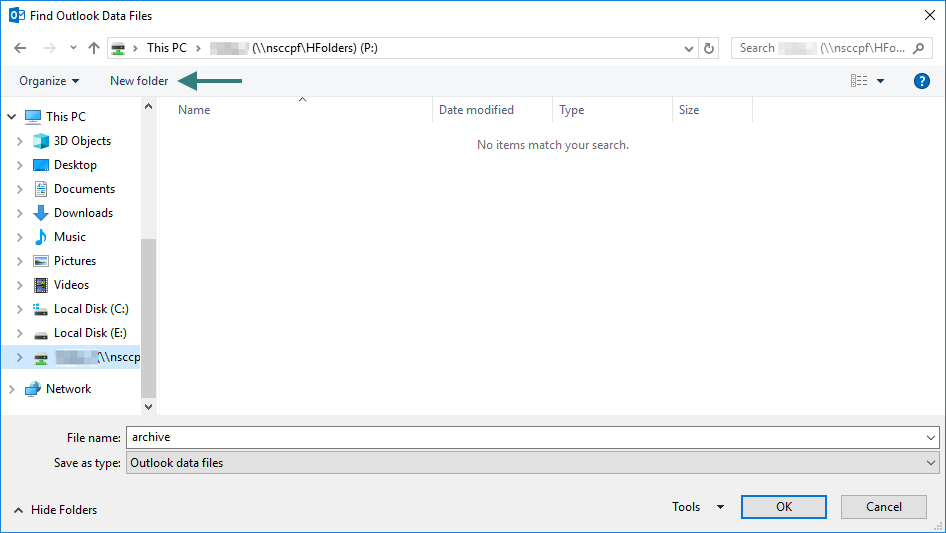
1. After clicking “Browse” a file explorer dialog opens
2. Navigate to your P drive (Personal drive/Home folder)
3. Click “New folder” to create a new folder in your P drive
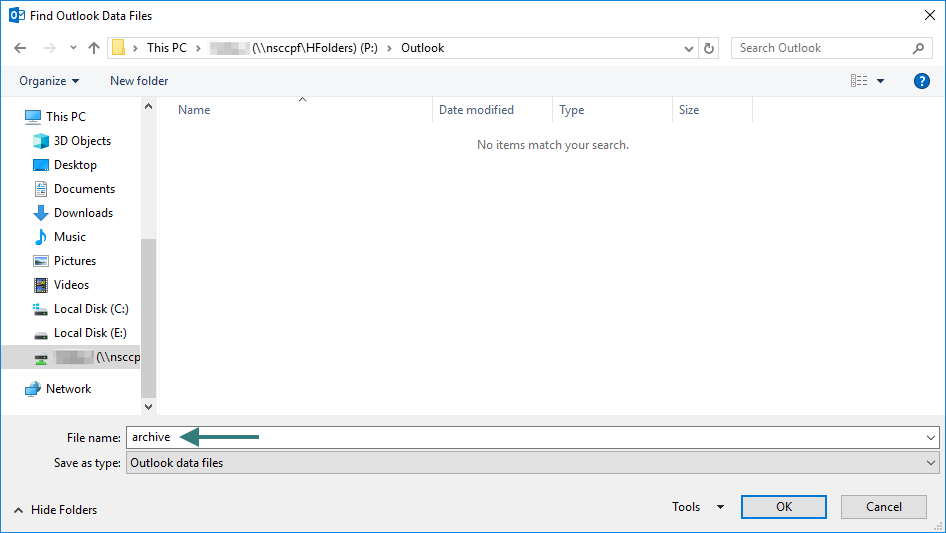
4. Give the new folder a name, such as, Outlook
5. Open the new folder
6. Name the archive file if desired
7. Click “OK”
The new archive file and location is displayed. Click here to continue with step 7e above.
Manual Archiving
Manual archiving only allows you to archive a single folder at a time.
1. Open Outlook
2. Click “File”
3. Click “Tools”
4. Click “Clean Up Old Items…”
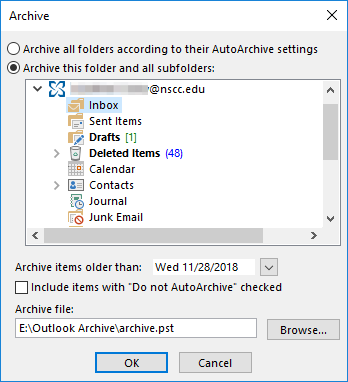
5. Choose a mailbox in the list
6. Choose the folder you would like to archive
7. Change the date to archive everything that was received on or before your selected date
8. Change the archive file location you would like to use by clicking “Browse”
Note: You can create new archive files by using a new file name, instead of using existing files.
9. Click “OK” to run the archive process
10. Repeat for any additional folders you would like to archive (Example: Sent, Drafts, Deleted, Calendars, etc.)